Wednesday, September 5, 2012

The 5 Best Ways to Improve Your Brews

There are two extremes to learning to brew. 

You can buy yourself a 10 gallon, pump driven, all grain brew sculpture and conical for 20 grand. You'll make beer, but you won't know HOW to make beer. Then you'll get bored, and try to sell it on Craigslist for half it's worth.

You can start from the bottom, using a Mr. Beer kit and working your way up, making every mistake you can make and learning from it. If you don't make wise decisions up front, you can end up spending a lot of money in the long run, but you understand exactly how every upgrade you make will improve your beer. This is what I did, and I know that it can be extremely frustrating when you make that one key upgrade and wonder why the hell you spent the last year making substandard beer.

Wouldn't it be great if there was some incredibly smart person who already made all the mistakes and had a blog where they could write about it? Yeah, that would be swell. 

1. Pitch More Fucking Yeast

You probably don't. Even if you've been brewing for years, I bet you don't.

If you're a newbie, and aren't willing to make a starter, USE DRY YEAST. I cannot stress this enough. A packet of dry yeast has at least twice the number of yeast cells as a vial of liquid yeast, and it's cheap. Direct pitching a package of liquid yeast is not enough for anything. It wasn't even enough for a healthy fermentation of my 3 gallon batches until I started making starters.

Pitch one 11 gm packet of US-05 for a 5.5 gallon batch of average strength beer, and don't be afraid to pitch 1.5 - 2 packets, especially for stronger beers and lagers. Properly rehydrated in 100 F water, of course. Pitching an extra packet of yeast costs you a whole 2 extra bucks per batch, just do it.

If you want to step it up, go straight to a stir plate and 2 liter flask. A 2 liter starter, decanted and pitched warm, will give you a strong, fast, healthy fermentation, and using liquid yeast will give you greater flexibility in the styles you can brew. The flask can be boiled and fermented all in one container, won't break when cooled quickly and is easy to swirl and pour. A 2 liter starter made with half a vial of liquid yeast will give you just enough yeast for a 6 gallon ale of around 1.070, cutting your yeast costs in half. A stirplate and 2L flask can be had for less than $60 and is probably the best investment I have ever made.

PS. Some people say you can pitch too much yeast. If you can, I haven't seen the limit. I've racked a 1.100 OG imperial stout right on top of a dry irish stout yeast cake with no ill effects. It finished fermenting down to 1.030 in two fucking days and tasted great!

2. Just Fucking Buy BeerSmith Already

And I mean buy it, not pirate it. It costs what, half the price of a batch of beer, and you'll be supporting a guy who works hard to support your habit, both with podcasts and frequent software updates. BeerSmith is hands down the best brewing software I've ever used. I use it to maintain a detailed brew log, design recipes from scratch, scale other recipes for my batch size and efficiency, and calculate anything I could possibly need to when brewing up a batch. Just don't pirate it, you cheap asshole.

3. Don't Waste Your Time (Or Money) On Partial Boils

Brewing with extract is perfectly okay. You can and will make great beers with extract, but you absolutely need to do a full boil. Right from the get-go, no topping up. Why?
  • Better hop utilization. Open up BeerSmith (you don't have it? Go back to number 2). Try designing a recipe where you top it up with 3 gallons. Look at your IBUs. Now change the top up water to 0 (i.e., full boil). Now look at your IBUs. You can make this better by adding most of your extract at the end, at least.
  • Less chance for contamination. This should be obvious. Half of your water wasn't even boiled - probably right out of the tap. Add that to the fact that you're probably trying to save yeast by pitching half a packet of dry yeast and getting 2 day lag times, it's no wonder your beer is infected.
  • Better taste. This one's obviously difficult to quantify, or even prove. Some people say the source of 'extract twang' is due to stale extract, but others attribute it to a concentrated boil followed by dilution. Regardless, you know who doesn't do partial boils? Jamil. Tasty. Pro brewers. People who win contests. People who make better beer than you do.
  • Replicating recipes. See the last point. Do you think that brew you read about in Brewing Classic Styles or heard on Can You Brew It was topped up with tap water? No. Your beer may taste okay, but it won't taste like it's supposed to. Pretty much any recipe written by a professional or an advanced homebrewer assumes, at a bare minimum, that you're boiling everything at once.
  • You're going to do it anyway. Come on, if you're even halfway serious about homebrewing, you'll go all grain sooner or later. And when you do, you're going to be doing a full boil. If you don't do all grain or full boils for the rest of your life, make sure you put a pound of hops in every brew so no one can taste how terrible it is.
This one will cost you. You'll need a larger brew pot, 8-10 gallons (a ball valve is nice, but not 100% necessary). You'll need a propane burner. You'll almost certainly need a wort chiller. Here's why it isn't as expensive as it sounds, and why it's totally worth it:
  • Brewing on the stove top sucks. I ruined the electric stove at my last apart, and that was doing 3 gallon boils. The landlord charged me 50 bucks when I moved out for the cosmetic damage, but that's because she didn't charge me when she repaired the melted wires in the stove. If I had told her it was my fault due to brewing on the stovetop, she probably would have. The first time a repairman charges you $200 to fix your f'ed up stove, you'll wish you had just started on a propane burner. Plus, the gas stove at my new place takes about 45 minutes on high just to bring 3 gallons to mash-in temperature. Ugh, no thanks.
  • You can buy 5 gallon pot for $50 now, then a 9 gallon pot with two welded ports for $90 later. Save yourself some money and just buy the bigger one right now.
  • You can get a propane burner for $50 at Home Depot or wherever. When the rapture comes and you are cut off from all utilities, you'll be glad you have one. Plus, em, you can make a shit ton of chili on it with that big shiny new pot you have. You also probably already have a propane tank for BBQ - hell, I lived in a 500 square foot apartment and I already had one.
  • Chilling wort in an ice bath REALLY sucks. I'd recommend a wort chiller even if you AREN'T doing full boils. Ice baths really just suck that much.
  • Again, if you're going to go all grain, you'll have to buy all this stuff anyway. So it's basically free, right?

4. Fermentation Control

Keeping your fermentation temperatures under control is the number one most important thing you can do improve your brew. So why is it #4? 

The problem is, it's a huge pain in the ass and isn't always worth it. For example, if you keep your beer in the house and set the thermostat to 62, it's probably going to be fine. Most of the year, it won't even get hot enough to worry about. Plus, not everyone has the room in their house or the money to spare on a temp control solution, especially when the difference is between fermenting at 67 degrees and fermenting at 72. 

You can also solve the temperature problem by just not brewing in the summer. Make wine instead, I guess. That's how the Bavarians did it - their summer beer sucked balls, so they made it illegal to brew in the summer. Problem solved.

Finally, it just isn't exciting. There's no WOW factor to controlling your fermentation temperature. It isn't fun, or interesting, but if you're making hot, fuselly, estery, phenolic beers that are prone to infection, or if you want to make lagers, it is a game changer.

Unlike the first three items on the list, which you should do before even starting your first damn brew, I'd recommend getting a chest freezer as soon as you can spare the room and money for it. Keeping it in the house is best, where it won't get too cold at night and the temperature swings are less drastic. If you live in California, like me, outside it fine, but you still need to keep an eye on it so it doesn't get too cold or cycle on and off too much.

You can pick up a 5 CF chest freezer for $50-75 on Craigslist if you keep an eye out. A Ranco ETC-111000 will run you about $50 on ebay, unwired. You can see how to wire it yourself here and save yourself some money. It is digital and you can switch it from heating to cooling just by pressing a button. If you have huge temperature swings (100 during the day, 40 at night), you may need to use a dual stage controller like the Ranco ETC-211000, which lets you connect the freezer and a heating device at the same time.

5. Stop Storing Your Beer On a Hot Shelf in the Laundry Room

Stop it. And you wonder why that beer you sent to the local comp was hazy, infected, oxidized and had no hop character. Beer needs cold to settle out yeast and to keep it from premature aging. Putting your beer in the fridge is the best way to ensure it is clear and doesn't taste "young" (a.k.a., yeasty, green). It also doesn't cost you anything, though your significant other may object. 

I really wish the dumbasses at homebrewtalk.com had emphasized how terrible your homebrew tastes after you leave it warm for 3 months, instead of always claiming that time heals all wounds. It doesn't. Ferment it at the right temperature, with enough yeast, enough oxygen, enough nutrients and just enough time to clean up yeasty byproducts, then chill the shit out of it as soon as you can. Most well made beers taste great after about of month of total time fermenting and aging. Hell, it should taste pretty damn good right out of the fementor. If you have to let it age longer than that before it tastes good, either you made a big, aggressive beer (RIS, barleywine, scotch, etc) or you suck at brewing. Go back and read the first four points.

The next logical step here is to start cold conditioning your beer. My beer didn't stop tasting like 'homebrew' until I started kegging. But, it wasn't the kegging or the force carbonation that did it. The difference was that I was able to get my beer cold as soon as fermentation was done and keep it cold forever after. Not only will you settle out more of the yeast (and faster), thus eliminating common green/homebrew flavors, your homebrew will last you months (or years) before going south. Your IPAs will thank you especially.

If you can manage it, stick your carboy in a fridge for a week or two before bottling. Do it Sierra Nevada style - put it in the fridge to knock out all the yeast. Make sure it is crystal fucking clear. Then add about 1 gram of yeast (rehydrated) to your bottling bucket with the priming sugar. Make sure to let your beer warm back up to room temp before bottling. Say hello to clear, professional-tasting beer, and say goodbye to that enormous yeast plug in the bottom of your bottles.

The ultimate solution is to start kegging. I won't go into that now, but man guys it is so awesome. You have no idea.

6. ((Bonus)) Go All Grain

Okay, not on day one. I mean it. Take some time, learn to brew with what you've got. Maybe even win a comp or two with your extract beers. Really get to know your system as it is. Then step it up.

Brew in a bag pretty much costs less than 5 bucks to start. Just use your big-ass pot (you've got one now, right?) and a paint strainer bag. You'll be limited by how much grain you can fit into the bag you buy, and your wort will have much more 'crud' in it since you don't vorlauf. Your efficiency will also be lower if you don't sparge, but you can batch sparge with BIAB and get 75-80% efficiency.

The next step up isn't too expensive either. I mean, you already have the big pot, the wort chiller and the propane burner. You know what else you probably have? An ice chest. Something like this Coleman Xtreme. I bought it a few years ago for like...50 bucks on Amazon, to use when camping. Now, go to www.bargainfittings.com. Get this and this. Screw everything in according to their instructions. You now have a big enough mash tun to make 10 gallon batches of fucking Barleywine, and it probably cost you less than your brew kettle. Google "denny conn batch sparge".

PS. LEARN

Read every book you can find. Listen to everything The Brewing Network puts out (they put out a lot, if you know what I mean). Don't trust everything you read on homebrewtalk.com, but DO read homebrewtalk.com. Join the AHA, then read through all of their free back issues of Zymurgy. Subscribe to BYO. Find a local homebrew club and join it. Enter your beer in comps even if you don't think you'll win - you'll still learning something. Experiment. Most importantly, don't let an infection or a bad beer get you down - figure out what went wrong, fix it and keep brewing. 

Saturday, October 1, 2011

Recipe Recap: #21 - #25

Today's Recipe Recap will cover brews #21 through #25. There were 3 rebrews - all disappointing. There were a lot of problems and disappointments here. It almost feels like my brewing is going backward. A big part of it was using harvested yeast and having a hard time controlling fermentation quality during the summer.

#21, Firestone Walker Union Jack IPA Clone 2.0
The result was definitely better than the first. However, I got way too much ester and phenol character, and what I'm pretty sure was chlorophenols, which eventually went away. The flavor was okay, but never quite right. Carbonation was great, but the beer wasn't nearly dry enough. I was discouraged enough to never bother with this recipe again.

#22, Janet's Brown Ale 2.0
Well, this one was mistakenly made with pale chocolate malt, and that made it completely different. Without the mild roast of the chocolate, this one just didn't taste right. On top of that, it was way overcarbed, maybe due to underattenuation. No roast at all, pretty much just bready and hoppy. Disappointing. Entered this one in competition because I ran out of Sweet Stout - didn't expect it to do well and it didn't. It was slammed for too much carbonation and lack of roast, among other things.

Still, I'll probably try this again eventually.


#23, Pliny the Elder Clone 2.0
This was a huge improvement over the first attempt, but it still only sorta tasted like Pliny, and I couldn't come anywhere near the dryness of Pliny. The greater sweetness of my version blocked some of perception of bitterness, so it didn't seem that hoppy (despite the obscene amount included in the recipe). I entered one in competition, but lost a lot of points because most of hops had dropped out due to age, making it seem sweeter and revealing flaws in fermentation. It was pretty damn great early on, and has convinced me to throw my IPAs into the refrigerator as soon as they are carbed.


#24, Heretic Evil Twin Clone
An infected disaster. This infection may have continued into batch #26. First time I've feared for my health due to a bottle bomb infection. Maybe I'll try making this again someday, but I'm not really sure just yet.


#25, McQuaker's Oatmeal Stout
Pretty awesome, despite its flaws. Would've been better with fresher, healthier yeast, lower carbonation and a bit more sweetness and mouth feel. I will be rebrewing this with my own tweaks to make it my own recipe and correct its flaws.


Saturday, September 24, 2011

All Grain Recipe: #28 Jamil's Chocolate Hazelnut Porter

Another damn infection!

Okay, I wanted to create some beers for Thanksgiving. Something holiday-ish but not necessarily 'holiday' or "christmas" beers. I decided to go with a chocolate hazelnut porter and a witbier - both are spiced, but not 'holiday' spiced. The porter would be the more interesting one, while the witbier would be for family with less adventurous palates.

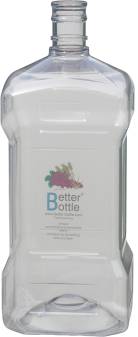
I retired my Mr. Beer kegs for this batch, and have moved entirely to Better Bottles. I picked up an extra one at HopTech in Dublin while mashing.

The recipe calls for baking cocoa added at the end of the boil. This turned out to be difficult, and it didn't distribute evenly until it boiled for a while (even then it was chunky). It sunk to the bottom of the fermenter. During fermentation, the cocoa all went up to the top with the krausen. It was all very strange and made me uncomfortable. If I were to make another chocolate beer, I'd stick with cocoa nibs or chocolate extract!

True to my word, I didn't repitch yeast. I used a fresh vial of WLP001, but with no starter. After a month in primary, the FG was insanely high - 1.028. Even given the amount of specialty malt, the attenuation was way too low, about 57%. Out of fear that I'd get bottle bombs, I bottled these all in 1 liter PETs, which would bend instead of exploding if fermentation started up again in the bottle.

After 3 weeks in the bottle, carbonation was perfect, but the flavor was... off. Ashy, like a freshly burned candle or incense. Unpleasant, and the hazelnut and chocolate just made it worse.

One more week, and suddenly all of my bottles were bulging. Opening the bottles led to a fountain of beer.

Okay, so I did have underattenuation, which led to fermentation in the bottle. No big deal, right? Just let off pressure until the CO2 level hits the right amount, then drink. The problem is that the flavor got worse instead of better, and no amount of pressure relief led to a proper amount of CO2. I believe there was an infection that didn't manifest itself until after the beer was bottled.

After I realized it was likely an infection, I poured everything out. Yet another failure; I'm starting to get discouraged.

Anyway, as usual the recipes are after the break.

Sunday, September 11, 2011

All Grain Recipe: #27 Mirror Pond Pale Ale Clone

For this recipe, I thought I'd make a clone of Deschutes Mirror Pond Pale Ale, from Can You Brew It.

Another not so great brew. This time, the problem was the yeast. I created a starter from a repitch of WLP007 (instead of the WLP002 the recipe called for). The first sign of trouble came when I smelled the starter, which was way more "Belgian" than it should have been. I thought it might just be the starter, so I pitched it.

I soon discovered it wasn't just the starter. Samples taken from the fermented beer tasted more like a Saison than an APA. They weren't bad, and the flavor mellowed over time. If it was an infection, they would get worse over time. I decided to roll with it, after letting it sit for twice as long as I normally would. I dry hopped it and bottled it, and when I tried it two things jumped out at me:

1) The carbonation was correct, unlike many of my other brews which were way overcarbed.
2) It wasn't bad! The Saison with citrusy cascade hops wasn't a bad combination.

After this brew I decided I'm going to stop repitching yeast. When it works, it is great, but it is too inconsistent. Yeast can mutate too much after only a few repitches, especially if the harvesting isn't done just the right way. I suspect the lack of attenuation in many of my beers may even be caused by less healthy yeast from repitching. It will only be fresh vials from here on out.

Recipes after the break.

Sunday, August 28, 2011

All Grain Recipe: #26 Rogue Dead Guy Clone

This was an infected disaster. It was infected some time in secondary by my house wild yeast. It started fermenting again out of nowhere, and by the time I threw it out it had an astringent, Belgian-y flavor.

Let us never speak of it again.

For those curious, the recipe came from Can You Brew It, and is just after the break. I included notes I took while listening to the podcast, which is here.

Saturday, August 27, 2011

Yeast: Bottle Harvesting

Bottle Harvesting: the process of bringing nearly dead yeast back from the dead. Yeast Frankenstein, if you like.

Maybe you want to brew a spot-on clone but they don't sell that particular brewery's yeast strain. Maybe you're cheap and want 'free yeast'. Or maybe you're just a homebrewer, and you don't need a goddamn reason. Here's how.


Monday, August 15, 2011

Recipe Recap: #16 - #20

Today's Recipe Recap will cover brews #16 through #20. My brewing is definitely getting better. I improved my process, lowered my efficiency, corrected my pH, cleared my beer more, carbonated properly and controlled my fermentation better.

#16, Firestone Walker Union Jack IPA Clone
First, the bad news. This didn't really taste like Union Jack at all. I bittered with Columbus hops for 60 minutes instead of Warrior for 90, giving it a much harsher bitterness. My OG was off, and it attenuated more than it should have. My high efficiency led to a lack of strong malt character, so it was hop dominated (more like my pliny clone). My lack of pH control led to a little bit of phenolic off flavor and astringency, but very very little.

Finally, the carbonation was higher than I'd like, making the beer seem harsh. Oddly enough, I have to carb around 2 - 2.2 volumes, using BeerSmith's calculator, to reach a level of carbonation that is close to what you'd get from a commercial bottle or draught. This beer was carbed to around 2.6-2.7 volumes.

Also, I tried to dry hop without a hop bag. That was a huge mistake, and I lost almost a gallon of beer to hops before all was done.

The good news is that it was a pretty good beer. It just wasn't a clone, and it wasn't perfect.


#17, Janet's Brown Ale
Holy cow, this stuff was good out of the gate. I had one after only being in the bottle less than two weeks and it was fantastic. I carbed it properly, to around 2.3 volumes. The head was thick and creamy and lasted a long time. The hop aroma was strong and pleasant. The hop flavor and subtle roastiness of the chocolate malt went hand in hand. The mouth feel was nice and thick but never sweet, and very drinkable. My best beer so far!

If there was any complaint, it might be that the specialty malt flavor wasn't as pronounced as I expected and there was a hint of phenolics in the background. I only noticed it when I compared mine to a commercial Black IPA that had a similar flavor.

I'd love to try the real thing and compare! I've also rebrewed this one with some improvements to my process. I carbed to 2.3 volumes, and will probably reduce that to 2.0 - 2.1 next time I bottle.


#18, Stone Levitation Clone
Light, dry and orange-y. Drinkable and full of flavor, though more and more I prefer beers with a very thick body. I can't detect any off flavors, though.

Carbonation is a little high at 2.5, and I would reduce that to 2.3 next time. I had to sub Mt. Hood for the Crystal, which may have had significant impact on the flavor. Aroma and flavor are definitely dominated by the orange citrus of the Amarillo. Over time, the flavors have 'melded' together into a more cohesive single flavor, where before it felt like a combination of different flavors competing for my attention. I don't know if that makes sense, but it's the only way I can describe it.

This will probably taste closer to the original if I lower my efficiency and adjust my specialty malt percentages. Of course, I haven't compared it to the original. I'll come back and update this post when I do, or create an entirely new post.


#19, JZ's American Pale Ale
Well, I'm not the biggest fan of Pale Ales in general. They're usually pretty dry and boring. For me, a glass of beer is an event, not something I drink pints and pints of. It tastes decent, though a little young, and the carbonation feels higher than it should. I think the flavors need time to merge. It currently tastes like hops and malt, instead of a single combined 'pale ale' flavor, if that makes sense.

This is my first beer made with a lower efficiency, 5.2 pH stabilizer and gelatin finings. I can definitely tell. The beer is clearer and cleaner than any before it. I detected no off flavors. Very clean and very drinkable. The flavor is similar to Levitation, probably due to using the same base malt (Great Western American Pale Ale malt, a US version of British pale malt).


#20, Triple-X Sweet Stout
Heaven in a glass. This will be gone in no time, even though I'm only drinking on weekends on my diet. Thick but drinkable. Slight milk-like aftertaste. Creamy espresso and chocolate flavor, with a hint of alcohol. Not hot alcohols or off flavors that I can detect. This one has been in the bottles only two weeks and yet is nicely carbed, creamy and delicious. Proof that if you need to age your (lighter) beer more than a few weeks, you probably did something wrong.

I carbed to 2 volumes, and will probably reduce that to 1.8 or 1.9 next time. There *will* be a next time.


Sunday, August 14, 2011

All Grain Recipe: #25 McQuaker's Oatmeal Stout

My first oatmeal stout, based on Jamil's Brewing Classic Styles recipe.

The resulting beer was unusually acidic and overcarbonated, even though I only carbed it to 2.0 volumes with corn sugar. I suspect that it wasn't fully attenuated, and may have finished attenuating in the bottle.

My wife loved it, and it tasted pretty damn good to me, even with the flaws.

I also sent it in to the Northern California Homebrew Festival competition, where it received a 27/50, with the following taste notes:


Aroma:
* Med fruity esters + med phenolics gives odd aroma like cola.
* Strong pear ester, some caramel. Light a weizenbock. Roasty notes as it warms.


Appearance:
* Dark, dark brown in color, opaque. Tall brown head, fine bubbles. Mouss-y w good retention.
* Rocky head, creamy dark brown, clear, med persistent creamy head, low CO2 (low???? later he says lots of CO2)

Flavor
* Malt sweetness, roasted notes (coffee+milk). Fruity esters, slight tartness. Low hop bitterness leaves the balance a little sweet. Roasted acid finish.
* Moderately sweet with caramel, not very roasty. Sharp fruity ester, finishes slightly dry. Slightly tart. Slightly oxidized? (no way)


Mouthfeel:
* Medium body, lighter due to carbonation. Slight creaminess but comes off as watery. Higher acidity in the finish.
* Med-full body, not as creamy as expected. Medium carbonic bite, tingly. Slightly dry, not huge or chewy.


Overall:
* An interesting beer that's difficult to describe. Hard to say the acidity is due to infection - it's almost like star san. My guess is that you lost temp control during fermentation, finishing and storage, which gave a bunch of esters. Maybe an older extract batch?
* It seemed like the fermentation wasn't clean enough, esters were too strong and reminiscent of wheat beers. Body was slightly low.

Recipes are after the break.


Thursday, August 11, 2011

Munich Madness recipe on AHA site

The official AHA web site just posted JZ's Munich Madness recipe, which I brewed a while back (batch #15). If you want to brew this as extract and don't want to convert from my all grain recipe, check it out.

Wednesday, August 3, 2011

Better Bottle!

As I mentioned in my last post, one of my Mr. Beer kegs sprung a leak. I need to transfer a batch to secondary this Friday, but I no longer have an extra vessel.

I went to HopTech over in Dublin, CA to pick up a 3-gallon Better Bottle. While I was there, I also got the "breathable bung". It costs more than a standard stopper and airlock combo, but you don't have to worry about the water being pulled into the vessel, krausen overflowing up into the airlock or the airlock falling off. It also has less moving parts, and is equally useful as an airlock and a stopper. Here it is at HopTech, and it is pretty similar to this, but not quite the same.

Anyway, for the moment I only have plans to use this as a secondary. Why not primary with it? I wasn't kidding when I said the Mr. Beer kegs are great. I can't put any carboy, not even a 3-gallon one, into an ice chest. That means I have zero temperature control. It's summer, and that means I might as well not even bother unless I want an estery beer dominated by fusel alcohol and god knows what else. Not to mention the ability to easily take a sample every day. No, I won't be giving up my Mr. Beer kegs for primary until I have room for a freezer + Johnson controller for temp control.

I went with the solid version, which has no spigot or hole for a spigot. The problem is twofold - their spigot is expensive (more expensive than the bottle itself) and strangely designed. Furthermore, I don't know how I would install my own spigot, since I can't very well get my hand into the bottle to tighten the nut. This means I have to rack with my easy siphon, but oh well. Since it will be holding secondary + gelatin, there will be relatively little trub + yeast to disturb.

As my Mr. Beer kegs die, I'll be replacing them with Better Bottles. If and when I switch to 5-gallon batches (for example, if I want to get fat or I have 5 times times as many beer-drinking friends >.<), I'll definitely be using 6-gallon Better Bottles. Heck, I even heard that JZ now ferments primarily in BBs, even for Heretic pilot batches. You can't get a better endorsement than that.

Now, if only they would design a Better Bottle with a larger opening, I'd be one happy camper!

Mr Beer: Replacing Your Spigot

You've already heard me expound on the virtues of the Mr. Beer keg. It's small, it fits in your fridge or in an icebox, it has a spigot for taking samples and easy racking, it has a wide opening on top so you can fit your hand in for cleaning, it's made of PET plastic like a Better Bottle, the bottom is shaped like a reservoir for collecting yeast & trub and it has one-way vents so you don't need an airlock.

However, it has one major flaw - the spigot it comes with sucks. Really bad.

One thing you could do is pick up a locking spigot. I have two, and you can use it for racking if you attach a bottling wand and hose to it. It isn't ideal though.

There are two types of spigot. You can find the standard Italian Spigot (left) at almost any homebrew shop. Example: here. I don't really like them, but they're better than nothing. The problem is that the entire valve turns when you switch it from on to off and vice versa. Also, they look cheap.

What you really want is one of these. They're basically a ball valve-style spigot, but made of plastic. You can get them in multiple sizes, and the hose doesn't turn when you turn it on and off.

The problem with both of these is that neither fits in the tiny hole in the Mr. Beer keg! I haven't checked recently, but I believe that the hole in the keg is 3/4" while these larger spigots require a 1" hole. Supposedly, the spigot on the right comes in a 'mini' version for a 3/4" hole, but I've never seen it for sale anywhere except for a homebrew shop in Canada that doesn't have an online store!

Solution? Sharp objects.

As I'm a pretty urban guy, I don't exactly have a ton of power tools sitting around. If you have a dremel though, this is easy. Use a coarse sanding attachment to widen the hole on your Mr. Beer keg. Widen it evenly, and stop as soon as the hole is large enough to fit your new spigot. Switch to a fine sanding attachment to smooth out the rough edges. Attach the spigot with the rubber washer on the outside and you're set! Racking from your keg can now be done by simply attaching a 3/8" ID hose directly to the barbed spout.

What if you're like me and don't have a rotary tool? Errr, well, time to cross your fingers. I used a utility knife. I slowly chopped away at the edges. It wasn't pretty, but it worked. I've done it to three kegs so far, and only one of them leaked. It was a very small leak of about two drops per minute, but I threw it out. To avoid leaks, don't cut too far down, and avoid deep, angular cuts. It doesn't have to be a perfect circle, but at least try to make your opening closer to an octagon than a square or star shape. Once you attach the spigot, the washer and nut will cover your grotesque cutting job, so it really doesn't need to be pretty.

Update: while I don't have a rotary tool like a Dremel, I do have a cheapo electric screwdriver/drill. I was able to find a sanding attachment that locked right into any standard drill. I used the coarse version and got a nice round, smooth hole in less than a minute. If you have literally no power tools, go ahead and try the utility knife version, but a power drill can cost less than twenty bucks and you will definitely use it again.

An interesting bit of trivia is that the very bottom of this spigot reaches exactly to the bottom of the keg. If you set the keg on a table, the keg will lie flat, but the spout will drag on the table's surface.

Another neat bit of trivia is that Mr. Beer is currently testing a new spigot that is designed quite a bit like this one. They haven't released it yet, though, but I believe it is essentially just the "mini" version of the spigot I use.

Saturday, July 30, 2011

All Grain Recipe: #23 Pliny the Elder, v2.0

I decided to give the Pliny clone another go. The problems I had last time were these:
  • Slightly fruity; maybe even hot alcohol. Possibly high fermentation temp.
  • Bitterness was too harsh. I'm not a huge fan of Columbus for bittering. Something smoother like Warrior or Magnum would be better.
  • Not dry enough. Needed to do something to dry it out: more sugar, less crystal, lower mash temps.
  • Carbonation was too high. Reduce it to 2.2-2.3.
  • Too dark. Not really a problem, per se, but Pliny is very pale and mine was more dark bronze.
I ended up following the MoreBeer pliny clone recipe pretty closely this time, here.

The recipe can be found here, if you search for "Pliny" on the page. Note that this recipe uses dry yeast, while I recommend the WLP001 liquid + starter. The recipe is also for 5 gallons. If you brew 6 gallons to account for a gallon of losses to trub and other stuff, you'll need to scale up.

This version definitely came out better, even if it still doesn't taste like Pliny. Even with my lowered mash temp, lowered Crystal amount and increased sugar, I still ended up with something pretty thick. My version is more like a typical Imperial IPA - more of a sipper. What makes Pliny different is that it is so dry and drinkable that you have chugged 2 pints of it and didn't even notice.

On the bright side, my newest brew has no off flavors or hot alcohols, and is very good regardless. It just isn't Pliny :P

Saturday, July 23, 2011

All Grain Recipe: #22 Janet's Brown Ale, v2.0

AKA, Janet's Light Brown Ale

Janet's Brown is the next of my beer rebrews - beers that I liked, but didn't come out quite as perfect as they could have. Several process changes later and I'm ready to make them even better.

As a reminder, the main process changes involved a lower efficiency, a change in the way I scale recipes to my efficiency, racking to secondary with gelatin, the use of 5.2 pH stabilizer and yeast nutrient and lower carbonation across the board.

What I didn't intend was to use Pale Chocolate malt instead of Chocolate. It must have been a brainfart while I was measuring out ingredients at MoreBeer. I didn't even realize the mistake until I was racking into the fermentor and wondering why in the hell my beer was brown instead of black!

For all of you who are confused, let me make it clear.

YOU CANNOT SUBSTITUTE PALE CHOCOLATE MALT FOR CHOCOLATE.

Ever.

You don't sub twice as much pale chocolate for chocolate, or half as much chocolate for pale chocolate. It is about more than color -- the the two malts don't even taste alike.

So once again, no matter what the doofuses at homebrewtalk.com tell you, there are no subs. Use the right one or get out.

Of course, using a different version of chocolate malt won't ruin your beer. It will just be a different beer. Since I've brewed the original, this is a pretty good way to compare the two. The main difference I noticed is that the new version, besides being brown instead of black, has a toasted bread or cracker flavor. It still has a bit of the roasted coffee-like flavor from the regular chocolate malt, but it is much more subtle and hidden in the background. It's actually pretty damn good.

Black IPA

Black IPA, also called Cascadian Dark Ale (esp. in the pacific northwest) is called an 'emerging' west coast or northwest style. It isn't technically a style category any more than American Strong Ale is, but beers made in this 'style' are pretty distinct can't be placed in any other category.

Black IPA is like a highly hopped American Brown. It has the color and roasted dark malt flavors of a Brown and the hop bitterness, flavor and aroma of an American IPA. If you want to brew one of these for competition, your best bet is to enter it into the Specialty Beer or American Brown categories. The gravity and hopping are on or past the edge of the American Brown category, but you can probably get away with it.

The Brewer's Association has this to say about Black IPA (or as they call it, American India Black Ale) in their 2010 Beer Style Guidelines:
American-style India black ale has medium high to high hop bitterness, flavor and aroma with medium-high alcohol content, balanced with a medium body. The style is further characterized by a moderate degree of caramel malt character and medium to strong dark roasted malt flavor and aroma. High astringency and high degree of burnt roast malt character should be absent. Fruity, floral and herbal character from hops of all origins may contribute to aroma and flavor.
Original Gravity (oPlato) 1.056-1.075 (14-18.2 oPlato) ●
Apparent Extract/Final Gravity (oPlato) 1.012-1.018 (3-4.5 oPlato) ● Alcohol by Weight (Volume) 5-6% (6 -7.5%) ● Bitterness (IBU) 50-70 ● Color SRM (EBC) 25+ (50+ EBC)
Some deride the idea of a Black IPA as nothing more than an American IPA with an ounce of black patent malt for color. Some brewers probably are guilty of this and deserve the mockery, but a true Black IPA isn't so easy to categorize.

Another probably with the name "Black IPA" is that the beer style has nothing to do with India and is certainly not a "Pale Ale". I'll leave arguments over nomenclature to someone who gives a damn, though. I'm more interested in drinking the beer than naming it. Still, there is a simplicity to "Black IPA" that'll probably cause it to catch on, no matter how flawed the name is.

Why am I babbling about Black IPAs? I found that I'm recently enjoying this great combination of deep, stout-like roasted malt flavor (one of my favorite styles) and American IPA hopping (another of my favorite styles). Mike McDole has claimed that his Janet's Brown Ale is closer to a Black IPA than it is to an American Brown, despite the name, and I would agree. I recently tried the Discord Dark IPA ($8 growler, including the bottle itself, from Pyramid) and was shocked by how close it was to Janet's Brown. The main differences between the two were level of roastiness and a slight difference in hop flavor. The commercial beer was also cleaner. In comparison to the professionally brewed example, I could taste flaws, particularly phenols, that I hadn't noticed before in my own beer.

I'm currently in the process of brewing Janet's Brown Ale, v2, and have made a nice big starter. Hopefully I can control the fermentation temp a little better and make an even better beer this time!

Friday, July 22, 2011

Recipe Recap: #11 - #15

Today's Recipe Recap will cover brews #11 through #15. This was a dark time in my brewing - of recipes #9 through #15, my only success was #12. It gets better though, and I won't be discouraged!

#11, Harold-is-Weizen Hefeweizen
A disaster in a bottle. I overpitched the yeast from a previous batch. Since the yeast didn't get a chance to grow and produce the characteristic clove & banana flavors, this beer ended up tasting like nothing. Nothing except cooked corn, that is. I forgot to do a 60 minute boil. Since this has a significant amount of Pilsner malt in it, the DMS levels in the final beer were very high. To top it all off, this beer was so overcarbed that half of the bottles I opened were gushers. I eventually gave up and dumped more than half of the batch to make room for new stuff.


#12, Pliny the Elder clone
There were definitely some problems. The massive amount of dry hopping left the beer a muddy brown-green color that took weeks in the fridge to settle out. The carbonation was just a little bit higher than I'd have liked (it gushed while warm but was fine when refrigerated). The body was thicker than the original Pliny, so my next attempt will use less Crystal, more Dextrose and mash at a lower temperature. The dry hop was pretty long, so I ended up with a more 'raw' hop flavor, though it wasn't so bad as to taste vegetal or grassy. I also used Colombus as the main bittering hop, which lent a harsher, oilier bitterness that made it less drinkable.

On the bright side, this was still a tasty beer, and definitely the best I had brewed so far. I'll definitely be iterating on this one, and intend to try a more updated recipe from MoreBeer (as opposed to the 'original' old school recipe I followed). The new recipe uses less Crystal, more Dextrose, more CaraPils, mashes at a lower temperature, bitters with Warrior and has a very slightly different ordering of hop additions. It also dry hops for a shorter time. This should lead to a smoother, drier, more drinkable beer.


#13, Arrogant Bastard clone
On the bright side, this does taste pretty close to the original.

On the other hand...

I accidentally bittered with Simcoe instead of Chinook (shame, since Simcoe costs twice as much). Read the labels on your hops!! My evaporation rate ended up way off, so I finished with around a quart and a half of extra wort and missed by OG by quite a lot. Worst of all, I overcarbonated this one by a ton. There were no gushers, but the flavors came out incredibly harsh due to the level of co2. Letting the beer flatten by swirling it constantly helped the taste. There may have been some astringent qualities to it, but that may have been a sensory side effect of the carbonation.

Not terrible, but not a success either. The ones in glass bottles can't be helped, but I was able to release some of the CO2 in the plastic bottles to improve the beer.


#14, English Apple Ale
Ugh, where do I begin. Lots of problems here. Tons of astringency from the apple juice - I'll probably use filtered apple juice next time in the hopes of getting less astringency from the apple matter. "Earthy" english hop flavor in the Mr. Beer kit didn't go well with the apple (frankly, I didn't expect any hop flavor in the Mr. B kit at all). Over carbonated, just like the last several batches, which combined with the English malt and apple astringency to create a beer that is super harsh and hard to drink.

Next time, I'd use filtered apple juice, American two-row (or some neutral, light extract), a clean bittering hop with no flavor hops and a way lower carb level (2.1 - 2.3). I'm not sure whether I'd use English or American yeast on the next batch. I went too crazy on this one, and should have started with a simple, neutral beer that happened to have apple juice in it.

On the bright side, the apple flavor was noticeable and there was a good residual sweetness in the beer.


#15, Munich Madness Oktoberfest/Marzen
Mistakes, mistakes, mistakes. Sensing a pattern yet?

First off, I 'innocently' adjusted the recipe with more hops because I had leftovers. I didn't want to leave just a few grams sitting around in the freezer, so I'd have tossed them out. I used 25 gm of bittering hops instead of 20 gm, and 15 gm of flavor hops instead of 7 gm. Yes, I used more in my 3 gallon batch than the original recipe calls for in 6 gallons (14 gm).

Then, I ended up with way too much pre-boil volume because I hadn't yet figured out the impact of grain absorption. I decided to boil longer instead. I ended up with too little wort and instead of topping it off, I thought I'd just have a stronger beer.

Finally, it's slightly overcarbed but not too bad. It doesn't gush, but I'd personally prefer something around 2.4-2.5 instead of 2.8.

Tastewise, the Hallertau character is way too dominant. I'm finding more and more than I'm actually not a big fan of Hallertau, and the fact that I used more than double what the recipe called for in the flavor addition is really obvious. The beer is also too big, with an alcohol warmth due to the high ABV (6.9% instead of 5%!!). It isn't as drinkable or dry as the style calls for, it is hard to detect the 'toasty' flavors that the style is supposed to have, and there is a very strong caramel flavor that reminds me of the recipes in which I used too much Crystal 15. I'm not even sure I can taste the munich malt behind the strong crystal flavor.

This one might still turn out to be okay with some cold conditioning, so I won't call it a failure, but I also won't call it a success.


On the bright side, my beers start getting WAAAAY better at #16 and beyond...

Wednesday, July 20, 2011

Dieting, Oh Noes!

All of this beer drinking has been bad for my waistline. I've put on probably about 15 pounds since I started this hobby and I need to take it off. Never fear though, not only will I still be drinking on the weekends, I plan to continue brewing just as often as before. I just need to find someone to take some of this homebrew off my hands...

Tuesday, July 19, 2011

Hops: Mash Hopping

Mash hopping: the process of adding hops, usually pelletized, directly into the mash. It supposedly contributes very little to bitterness but produces a unique type of flavor and aroma that you can't get with standard late hop additions.

Mash hopping is a confusing thing. By all logic, it shouldn't work. One would expect most of the hops to be left in the grain bed, and any hops that make it into the wort to be isomerized during the long boil that follows.

I'm not sure anyone knows why it works, and many people will tell you it *doesn't* work, but let your own experiments be the judge of that.

The following is according to Paddock Wood Brewing Co, quoted from their blog:
Based on the research of De Clerck and Fix, the theory is that the aromatic oils react in a special way with wort at a higher pH than occurs with wort during the boil (the pH falls during a boil, and reduces the utilization of the hop oils) and at a lower temperature (150F). The complex reaction between hops and the wort results in the formation of more permanent flavour and aroma chemicals remaining in the beer than is the case with traditional hopping methods such as late additions to the brew kettle. It may be important to use pelletized hops in this situation, however, as the release of aromatic oils from whole hop cones is greatly assisted by the action of the boiling wort. The pelletized hops are not transferred to the kettle but remain behind as the mash bed acts as a filter. The hop usage appears to be about 90% less than what you could expect from a start-of-boil addition, but we have not performed any technical data gathering or analysis.
I've tried it once, since it is a standard part of Janet's Brown Ale. Russian River Brewing apparently also uses it in their Pliny the Elder. Until I'm convinced, I won't be mash hopping unless a great recipe calls for it. I haven't done a side by side comparison, but some day I'd like to brew two identical batches - one that has been mash hopped and one that hasn't. I encourage any readers to try it and let me know the results.

Sunday, July 17, 2011

All Grain Recipe: #21 Union Jack IPA, v2.0

My original version of this recipe (here) had a lot of problems, but also a ton of potential. I've resolved to solve as many of those problems as possible in my first re-brew!


Recipe Recap: #1 - #10

Recipe Recap is a quick overview of where each of my recipes ended up: how they tasted, mistakes I made, how likely I am to brew it again and anything else that comes to mind.

Let's start with batches #1 through #10!


#1, Mr. Beer Classic American Blonde w/ Booster
My first beer ever. Thin, highly carbonated American-style blonde. Nothing special, but it wasn't completely terrible for a first attempt either. Chlorophenols from using unfiltered tap water and acetaldehyde (green apple flavor, due to using just one can of malt and one pouch of booster) dominated the flavor for a long time, but conditioned out. Not a terrible first try, and encouraging enough for me to continue the hobby.


#2, Mr. Beer Cowboy Honey Wheat
A much bigger, maltier beer than the Blonde, I ultimately didn't care for it. The honey left a flavor, despite what everyone claims, and the combination of high alcohol sweetness, honey flavor and the base flavor of the Cowboy Golden Lager recipe left a cloying kind of flavor that I couldn't get past. A couple months of conditioning made it decent, but further conditioning after that made it worse. I poured out half of the last PET bottle after drinking just a few sips.


#3, Mr. Beer Eye Opener Sumatra Stout
My first premium recipe and my first attempt at steeping grains. I'm not sure the half pound of crystal did anything, and I don't know what the bit of oatmeal I steeped at the last minute did. This came out as a very tart and thick beer with a nonexistent head and none of the creaminess you expect from a stout. It isn't bad, and I still drink it from time to time.

For reference, the 'tart' flavor is very much like the Alaskan Oatmeal Stout, so I don't think there was anything wrong with the recipe or process - it just isn't my style.


#4, Mr. Beer American Devil IPA
My second premium recipe, and the first time that steeping grains made a difference. In retrospect, I should have just steeped CaraPils. I didn't have an appreciation at the time for the flavor impact Crystal malt would have, even just the Crystal 15 variant. This as also my first time adding and boiling DME, and my first time using US-05.

This was my first indication that maybe the dipshits on the forums weren't quite as knowledgeable as their 3 years brewing and their matter-of-fact attitude would have you believe. Half a pound of Crystal is NOT appropriate for steeping in ANY Mr. Beer recipe, as it has a significant flavor contribution. This IPA wasn't bad - it was my favorite beer so far, and I went through it quickly. However, to this day I don't know what American Devil IPA is supposed to taste like due to the Crystal 15 I added.

As for the recipe, it was not hoppy at all, not even to me (I was not a hophead at the time). Bitterness was pretty high, but little to no hop character. A very malty, caramely beer.


#5, Mr. Beer Pilothouse Pilsner
Not a true czech pilsner, so I had no idea what to expect. My first time using CaraPils and my first time using Danstar Nottingham. I'd heard that if you fermented Nottingham cold, you'd get something close to a lager. I fermented too cold, and didn't do a diacetyl rest, and ended up with butterscotch flavored beer. It never went away. There was a slight hop bite, but not much hop flavor. Overall not great, but not terrible either.


#6, Mr. Beer Witty Monk Witbier
Unfortunately this turned out to be more Blue Moon than Hoegaarden, and more orange beer than white beer. The orange flavor was so powerful in the wort that it smelled like cough medicine. On top of that, I used  the Fermentis T-58 ale yeast, on the recommendation that it worked well with witbiers and other belgians. Perhaps that is the case with normal witbiers, but this was a Mr. Beer witbier and nothing like a real one. I can only describe the flavor as orange-y and salty, very phenolic from the yeast which clashes strongly with the sweet orange flavor of the beer. I try to pawn this off on guests but it's still not gone.


#7, Mr. Beer German Hefeweizen
Now THIS was a success. My first time boiling hops, though not exactly ambitious - it was just a quick 15 minute flavor/aroma addition of Hallertau. Also my first time using liquid yeast, and the WLP300 worked great, producing a very nice, dry, banana-flavored hefe. Very refreshing, and pretty close to what a hefe should taste like. It reminded me of Franziskaner hefe, but of course not as good. Still not bad though.


#8, Red Tail Ale Clone (aka Burnt Toast Ale)
My first all grain and half a disaster. My mash efficiency was terrible, my brewhouse efficiency was terrible and I was dumb enough to toast my own 2-row instead of just using Victory. It was also my first time using tap water in a long time, with campden, but I didn't use enough campden and ended up with lots of chlorophenols in this one. The toasted flavor was way too strong, and the ABV was about 2% lower than the real thing.

The worst part was that I used lots of Anchor bottles, and the ones that didn't outright snap at the neck or crack simply didn't seal well. At least 8 bottles of this were wasted because they weren't carbed at all. Don't use Anchor bottles. You've been warned.

On the bright side, after several months of conditioning this went from being a disappointment to being my best beer. The carbonation was medium (unlike my later brews), the head was nice and creamy and the toasted flavor mellowed out and ended up working really well. The first beer I really missed when it was gone. The best part is that the final bottle...turned out to be a dud. Au Revoir.


#9, Mr. Beer Oktoberfest Vienna Lager
Pretty meh, overall. I used 1/4 lb of Crystal 15, which I thought would've been better than 1/2 lb. Nope, shouldn't have done it. I also thought I'd use the rest of my Hallertau (left over from batch #7) as flavor and aroma hops. Nope, shouldn't have done it. At first it tasted a lot like Negra Modelo, but with a lot of chlorophenols in it. As it aged, it definitely got more caramel-y and the Hallertau character came out. It is drinkable, but not great, and I'm just trying to get rid of it at this point.


#10, Biere de L'inde English IPA
The worst yet. I was starting to get pretty discouraged at this point.

My efficiency was still terrible - turns out this was due to MoreBeer's grain mill being set so wide it did virtually nothing. I ended up extracting a buttload of tannins, and I don't know why. I followed the same process as batch #8, which had no tannins. The taste was off and worst of all, I carbonated way too high. I ended up with gushers, bottle bombs and injuries. If allowed to warm up and go flat, this becomes an okay but not great beer. It also had some chlorophenols early on, but not as bad as earlier batches.

This one is still around, but they are gushers as often as not. The liter-sized PETs can be opened to let the CO2 out, but the glass bottles are a lost cause.